Tuesday, December 24, 2013

Happy Christmas!

Well Christmas Eve has arrived and we're all very excited around here!

Today I just had one final Christmas card to make for this year.

Merry Christmas!

Stamps (Hero Arts) - Snowy House & Christmas Reindeer

I'll be sad to see my Christmas stamps going away for a while again, but considering I had to resort to sending some shop bought cards, maybe I shouldn't put them away for too long!

IMGP2255

Now I’m off to do a bit of last minute wrapping and some food prep for tomorrow. I hope you have a very Happy Christmas and wish you good health, happiness and lots of inky fun in 2014!

Sunday, December 8, 2013

Secret Santa

Over at the Hero Arts group on Flickr we have a little Secret Santa fun going on. Each Secret Santa is sending a Christmas card, a Christmas ATC and a little present to someone else who is taking part in the exchange. We'll only find out who our Secret Santa is when the package pops in through the letterbox.

I was playing Secret Santa to Laura and now that Laura has received her parcel I can show photos here. Well this Secret Santa was a forgetful Santa and forgot to take a photo of the little pressie but I did take photos of the ATC and card.

I just love the happy reindeer in the Christmas Reindeer set and pulled out one of them for the ATC.

Joyful Reindeer ATC

Stamps (Hero Arts) - Christmas Reindeer, Tiny Star Background, Designer Snowflakes
and Special Delivery


The reindeer was coloured with ProMarkers and layered in places for some dimension. To make the background, I applied distress inks (broken china, faded jeans & tumbled glass) to white card, spritzed water on the star background and stamped the panel. Then I stamped some snowflakes using faded jeans distress ink and embossed the sentiment. I wanted lots of sparkle on the ATC so added stickles to the snowy ground and white dots on the reindeer's jumper (sweater). In case it wasn't sparkly enough I also added a glittery red frame.

Next up is the card.

Love, Joy & Peace

Stamps (Hero Arts) - Designer Snowflakes and Special Delivery


For this one I embossed snowflakes on a panel of kraft card, inked the edges with white ink and did a bit of distressing. After stamping the sentiment and adding some gems, I layered the sentiment circle on a glittery die cut. To finish I just added a strip of ribbon and a bow.

I really enjoyed making the ATC and card for Laura and needless to say a trip to my lss to buy some little bits and pieces for her was fun too:) Hope you are having a fun and inky weekend:)

Sunday, December 1, 2013

Fabric Card & Pastel Christmas Tree Set

One of my favourite Christmas stamps from this year is Shari's Tree No. 3. When I first saw it it made me think of a Christmas tree that could be appliquéd onto a quilt. So out came the fabrics and I ended up using them for the whole card front, with some card used as backing for a bit of firmness.

Fabric Christmas card
Stamp (Hero Arts) - Shari's Tree No. 3

I stamped the tree on fabric, added another layer of fabric at the back, and stitched the outline using a machine. After cutting out the tree I gently frayed the edges back to the stitching and added some buttons. For the background I used a white fabric with a white design and the "snow" is a piece of batting. A piece of red fabric was used for the card front. After die cutting both of these pieces I also gently frayed them around the edges to give a fuzzy look.

As I had the tree stamp out, I decided to go ahead and make another card by stamping on various pieces of pastel coloured card. In the end as I had to stamp four trees anyway, I made a set of cards changing the sentiments on each.

Pastel Christmas Trees
Stamps (Hero Arts) - Shari's Tree No. 3, Very Merry Christmas & Special Delivery

I die cut the kraft panel pieces, stamped the tree on them and then added some stitching.

Merry Pastel Christmas Tree

After that I embossed the sentiments and lightly applied white ink around the edges.

IMGP2176

I paper pieced the trunks and popped the branches up on foam pads for dimension.

IMGP2173

For the background I embossed snowflake panels.

IMGP2172

I can't believe I made five cards today - must be a record for me, lol! I'm submitting these cards into the current Hero Arts Challenge (A Few of my Favourite Things category as I love stamping on fabric and also love paper piecing) as well as Simon Says Stamp's Anything Goes Challenge.

Friday, November 29, 2013

Snowy Hearts

I wanted to incorporate hearts into my hubby's Christmas card and needless to say I was back to the snowflakes again too!

Snowflakes and Hearts
Stamps (Hero Arts) - Designer Snowflakes, Very Merry Christmas & Christmas Reindeer

I die cut a heart from a square of red card and embossed lots of snowflakes all over the panel. Then I applied some white ink to the edges and did a bit of distressing. After dry embossing a panel of white card, I placed it behind the heart window and then embossed the sentiment on another die cut heart. All of the pieces are popped up on foam pads and to finish I just added some gems.

As I had bits and pieces left over from making the card, I decided to use them to make a small card to act as a gift card holder.

Snowy Heart Card & Gift Card Holder
Stamps (Hero Arts) - Designer Snowflakes, Very Merry Christmas, Christmas Reindeer & Sew Artsy)

Again I just embossed snowflakes on the large heart left over from making the first card. This time I added a bit of silver embossing on the sentiment and stitched line holding the heart ornament. To finish I added a gem, a bow and a little pocket on the inside to hold the gift card.

Snowy Heart Card - inside pocket for gift card

I'm submitting these cards into Simons Says Stamp Anything Goes Challenge and the current Hero Arts challenge (A Few of My Favourite Things category, as I love stamping and embossing and also love using individual stamps to make a background).

Tonight we'll be watching one of our favourite programmes that really signals the start of the Christmas season for us here - The Late Late Toy Show . So we'll be setting down with a big bowl of popcorn, hot chocolate and will make some s'mores by the fire - ah bliss! Hope your weekend gets off to a great start too:)


Wednesday, November 27, 2013

Joy in the Snow

I love ribbon and have a big drawer packed with the stuff, so I thought it was time to start adding some to my Christmas cards to try to eat into my stash.

It was out with the Designer Snowflakes set again and surprise, surprise I'm back with a red, kraft and white combination again - I can't seem to leave that colour combo alone this year!

IMGP2110

Stamps (Hero Arts) - Designer Snowflakes & Joy Burst


I started by embossing the snowflakes on a panel of kraft card, inked the edges with white ink and attached a strip of ribbon for my bauble. Then I added a border of red glitter card before sticking the panel to the card base using foam pads. Next up was the bauble. I die cut the picot edged circle and cut a circle from the same glitter card I had already used. Thanks to my friend Linda, I had the lovely Joy Burst image - thanks again, Linda:) On this card I just used the sentiment from that image, and to try to give it a snowy look covered it with a layer of frosted lace stickles and sprinkled on some powdery white glitter.

IMGP2121

After layered everything using foam pads, I just added a bow to finish. I'm submitting this card into Simon Says Stamp Anything Goes Challenge and the current Hero Arts Challenge - A Few of my Favourite Things category as I used one of my favourite techniques, stamping and embossing.

With all these snowflakes I'm dreaming of a white Christmas - are you?


Sunday, November 24, 2013

Sparkly Tree Tag Card

I've had great fun joining in on the current Hero Arts Challenge and this time I'm trying the Deck the Cards category for my little tag card.

Tree Tag Card

Stamp (Hero Arts) - Shari's Tree No. 3


To start with I die cut the label twice to form the tag card and die cut a frame for the front. Then I punched a little hole at the top for the ribbon and string. I embossed a little hill and added the frame using foam pads. After stamping the tree I cut it out and then things went a little off plan! I wanted to make a sparkling silver\white tree with blue decorations but as you can see that didn't happen. I used my embossing pen to cover the areas I wanted to emboss and sprinkled on stardust embossing powder. Even though I knew my embossing pen had a blue hue I thought it would be concealed by the embossing powder, lol I was wrong about that.

Tree tag card close up

Anyway I liked the end result so went ahead and decorated the tree with gems and pearls from three different packets of Hero Arts gems/pearls (sea mixed accents, light blue gemstones & spring mixed gemstones). I'm also submitting this into the Die Cut Divas Let's Celebrate Challenge.

Saturday, November 23, 2013

Prancing Through the Snow

One of my favourite cute Christmas stamp sets is Hero Arts’ Christmas Reindeer set - I love the sweet reindeer in their adorable little jumpers (sweaters) so much. I seem to be using kraft card over and over again on my Christmas bits and pieces so I took a big, deep breath and stepped away from it for this card!

IMGP1986

Stamps (Hero Arts) – Christmas Reindeer, Very Merry Christmas and Designer Snowflakes.

I stamped the reindeer a number of times and after cutting them out coloured them with ProMarkers. The heads and jumpers are on foam pads for a little dimension. Maureen sent me the pretty glitter domes that I used for the reindeer’s noses – thanks again, Maureen:) I save these pretties for any reindeer cards I make. Our sons were looking at the card after I made it, one said I should have only one Rudolph on my card but the other one said I could use artistic licence - so that’s my excuse and I’m sticking to it!

To make the background I put a mix of distress inks (broken china, tumbled glass and faded jeans) on a piece of tinfoil and spritzed with a water and perfect pearls mix. Then I pressed a panel of watercolour card over the ink and kept repeating the process until I was happy with the background. As usual, I'm finding it hard to capture the shimmer in a photo but here's a little glimpse of it in this photo.


Once the panel was dry, I stamped snowflakes using broken china and faded jeans distress ink. To finish I added some machine stitching and the sentiment stamped in barn door distress ink.

I’m submitting this card into the current Hero Arts Challenge, A Few of My Favourite Things category as I enjoying creating a scene with stamping.

Friday, November 22, 2013

Christmas Blessings

I'm off work today, so the weekend has started for me - yippee:)

IMGP1951

Stamps (Hero Arts) - Greatest Gift & Tiny Star Background

I thought I'd make another Christmas card using the Greatest Gift set from Hero Arts. To start with I cut out the banner and die cut an opening for the Nativity scene. Then I embossed the sentiment and added some faux stitching.

To make the background for the Nativity scene, I inked a panel of white card with distress inks (broken china, tumbled glass and faded jeans). Then I spritzed water on the Tiny Star background and stamped on the panel. I also added some splashes of water from a paintbrush.

IMGP1947

Once this was dry I stamped the scene and added a frame, a twine bow and a couple of gems to finish.

I'm submitting this card into the current Hero Arts Challenge (A Few of My Favourite Things category, as I used a favourite technique - stamping on distress ink with water) and the Die Cut Divas' Let's Celebrate Challenge. Hope you have a great weekend!

Sunday, November 17, 2013

Colourful Christmas

I love Hero Arts' cute New England Winter stamp and this time wanted to make a colourful winter scene with it.

IMGP1915

Stamps (Hero Arts) - New England Winter, Very Merry Christmas, Designer Snowflakes & Christmas Reindeer

I started by embossing snowflakes on kraft and inked the edges with white ink. Then I added some snow banks on foam pads. The little houses were stamped in various colours using either markers or distress ink. After cutting them out and adding them to the scene I added loads of stickles and some rhinestones for some sparkle.

IMGP1928

I wish I could capture in a photo all of the shimmer from the stickles. I'm submitting this card into the current Hero Arts Challenge (A Few of My Favourite Things category as I used a couple of my favourite stamping techniques - embossing and creating a scene with stamps).

Saturday, November 16, 2013

All wrapped up - well first one anyway!

I have to admit I have barely started my Christmas shopping, yet here I am thinking about how I'm going to wrap and tag pressies!

The other day I used Spellbinders' picot edge circles as the base for my tags and as I love the pretty edging, I took them out again for my next set of gift tags.

IMGP1852

Stamps (Hero Arts) - Designer Snowflakes, Christmas Ornament set & Christmas Tags set

This time I also went with a white/kraft colour combination but threw in some red too. I die cut the various layers and stamped the sentiments and snowflakes using barn door distress ink. After that I put the tags together using foam pads for some dimension and added some embroidery floss.

IMGP1910

Stamps (Hero Arts) - Designer Snowflakes, Christmas Ornament set & Christmas Tags set

When it came to taking photos of the tags they were slipping and sliding all over the place. But then I spotted these little guys who made the perfect props to keep my tags upright!

IMGP1908

I made quite a few of these tags in no time at all, and with a slight change in colour used one on a pressie I was wrapping.

IMGP1877

Stamps (Hero Arts) - Designer Snowflakes & Christmas Tags set

To make the wrapping paper I stamped a number of snowflakes (again using barn door distress ink) over a piece of paper taken from a plain roll of parcel paper. After adding ribbon I topped the present off with a tag. I can't believe I have my first Christmas present wrapped already - lol I'm never that organised!! I'm submitting these into the current Hero Arts Challenge (A Few of My Favorite Things category as I stamped sentiment frames and also made my own wrapping paper by stamping on plain parcel wrap) as well as the Die Cut Divas' Let's Celebrate Challenge.

Hope you have a fun and inky weekend:)


Thursday, November 14, 2013

Snowflake Gift Tags

After making my last card I still had kraft card on my table, so when I wanted to make some snowflake gift tags this morning, I went with a kraft and white colour combination. I love the very pretty snowflakes from Hero Arts' Designer Snowflakes set and used these on all of the tags.

IMGP1855

Stamps (Hero Arts) - Designer Snowflakes & Very Merry Christmas

I started by die cutting the tag bases and added some string. Then I die cut some kraft card, embossed the snowflakes & sentiment and added gems. To try to add an even more snowy look to the tags I inked the edges with white ink. The snowflake pieces were added to the bases using foam pads. These tags are so easy and simple to make and put together, I think I'll make a batch of them over the weekend.

IMGP1847

I'm submitting these tags into the current Hero Arts challenge (A Few of my Favourite Things category, as I used one of my favourite stamping techniques - stamping and embossing) as well as the Die Cut Divas' Let's Celebrate challenge.

Sunday, November 10, 2013

Snowy Village

It's getting a bit cooler here now, but so far we've had no snow. I do love snowy winter scenes on Christmas cards and wanted to use Hero Arts' pretty New England Winter stamp for my next Christmas card. I can just imagine sitting beside the fire sipping hot chocolate in one of those snowbound houses:)

IMGP1810

Stamps (Hero Arts) - New England Winter, Tiny Star Background & Christmas Reindeer


As I was going to cut out the building and pop them on foam pads for some dimension, I thought I'd go with a starry background instead of the snowflake background on the village stamp. So to start with I embossed the stars on a panel of pierced kraft card that I'd left aside from another project. The buildings were stamped using barn door distress ink. It's hard to tell from the photo but there is a lot of depth in the card as the snow banks, buildings and panel are all on foam pads. I embossed the sentiment and lightly applied some white ink to the edges of the die cut sentiment piece. To finish I added lots and lots of stickles to the card to try to mimic the lovely sparkle of snow.

IMGP1811

Sorry for the slightly blurry photo but I couldn't seem to get a clear one! I'm submitting this card into the current Hero Arts Challenge and the Die Cut Divas Let's Celebrate Challenge.


Saturday, November 9, 2013

Moxie Fab Thanks! Blog Hop


I'm delighted to be part of the Moxie Fab Thanks! Blog Hop, to celebrate and thank the moxie fab Cath Edvalson, former editor at Paper Crafts Magazine and brilliant blogger at Moxie Fab World!

You should have arrived here from sunny California from the blog of the very talented and sweet Nancy Krueger. If you didn't begin at the start of the hop, you can go to Moxie Fab World where the hop begins. A list of all of the stops on this blog hop will also be listed there.


Cath has been such a big part of the paper crafting world so needless to say I was very shocked and saddened when I read Cath's farewell post over at Moxie Fab World. So today I'd love to say thanks a million to Cath for everything and let her know I'll miss her so much.


In her farewell post Cath quoted Winnie the Pooh, and today I have to say to Cath, also in the words of that wise bear, I knew when I met you an adventure was going to happen. And what adventures I've had since I came across Cath's wonderful, inspiring, eloquent, fun and intriguing posts in Moxie Fab World. Because of Cath, visits to Moxie Fab World have always been a must for me. I've also thoroughly enjoyed playing along with the Tuesday Trigger and the amazing variety of challenges Cath has come up with over the years. Cath has always been so generous with her kind words of encouragement to paper crafters. She has even managed to keep me, a non trendy person, interested in and abreast of all the latest trends. My online “visits” to CHA with Cath have been fantastic. Often because of her I’ve ended up with a very long shopping list indeed!

IMGP1797

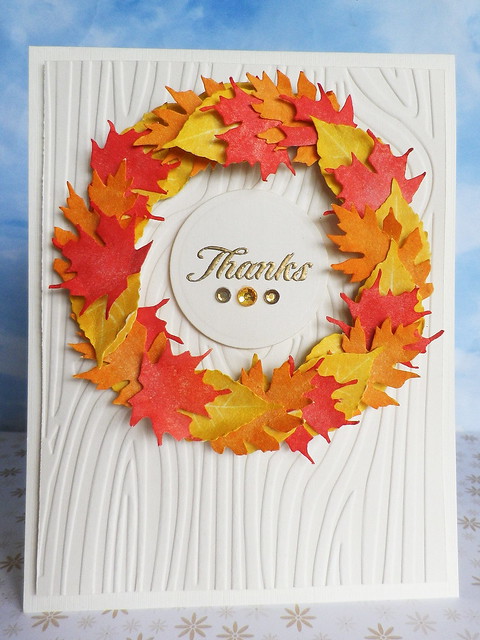
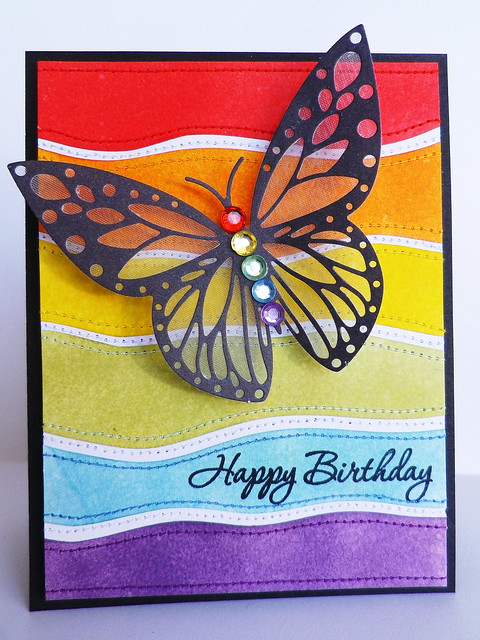
Stamps (Hero Arts) - Exotic Bloom & Dolls (sentiment)

Cath, this card was made for you and about you. The panel represents all the colour you have brought into my life, something for which I will always be thankful. I want to wish you all of the very best in your new adventure in life. I'm sure many, many exciting and fun experiences lie ahead! As the blog hop banner says, Cath, you'll always be moxie fab! Hugs and best wishes :)

Thanks so much for visiting today and now why don't you join me as I hop from here in Ireland over to Switzerland for the next stop in the hop. You will be visiting the lovely and talented Isha Gupta . Happy hopping and hope you have a wonderful weekend!

Saturday, November 2, 2013

Merriest Wishes

Now that Halloween is over, it's full steam ahead with making Christmas cards. I'm trying to come up with some ideas for quick cards to make for Christmas so I can get a number of cards made in any one sitting, or I should say standing, as I always seem to stand when making cards!

I pulled out the Merry Christmas Tree stamp and die set I got last year to make a card that is very quick and easy to put together. This card is for a relative who loves muted colours and lots of bling, so I went a bit wild on the shimmery gems! I'll probably make a couple more cards like this using different colour combinations.

IMGP1781

Stamps & die (Hero Arts) - Merry Christmas Tree & Very Merry Christmas

I started by embossing a square of vellum using a snowflake folder and applied some white ink here and there. Then I embossed the Christmas tree, die cut it and added lots of gems and a bow. The sentiment was also embossed and I lightly inked the edges of the sentiment piece and added a little gem.

I'm submitting this card into the current Hero Arts Challenge (A Few of my Favourite Things category) as I used embossing which is one of my favourite stamping techniques. Also I'm submitting it into the Die Cut Divas Let's Celebrate Challenge and Simon Says Stamp Anything Goes Challenge.

Someone here is already in their relaxed weekend mode!


Hope you have a relaxing, fun and inky weekend!

Thursday, October 31, 2013

Happy Halloween

The day our younger son has been eagerly awaiting with much anticipation has finally arrived, and now he's wishing away the hours until it gets dark enough to go out spooking! Meanwhile I need to run into the town to get some more cobwebs. With all the windy weather we've had recently there was no point in decorating outside until today, otherwise we would have had cobwebs, gravestones and creepy creatures blowing around the neighbourhood!

As usual I was up early so I thought I'd make a quick little Halloween picture.

IMGP1770

Stamp (Hero Arts) - Ghostly Greetings


The background is another piece of Core'dinations card that my friend Linda had sent me. I love embossing and sanding these to see what will be revealed. The sentiment was embossed and I just added a baker's twine frame. The little owl ghosts/witches represent our two boys who, each year, over the years have gone back and forth deciding what to wear for Halloween. So I thought I'd have the little owls trying to make up their minds about what they wanted to dress up as for Halloween. It's hard to see in the photo but I added gold pen and some stickles to the little buckles on the hats.

I also have to share another Halloween project, made by Linda. She sent me these super cute treat bags for the lads - I just love them and so do the lads! Thanks again, Linda:):) Here you can find details of all the supplies Linda used to make these fun bags.

IMGP1761

Hope you have a fun Halloween!


Tuesday, October 29, 2013

Santa Baby

I wanted to make a card for a baby's first Christmas and pulled out a stamp and die set as well as some blue Core'dinations paper, both of which my good friend Linda sent me. Thanks again, Linda:)

Santa Baby
Stamps (Hero Arts) - Onesie (Hero Arts Archiver's exclusive), Small Variety Alphabet & Christmas Reindeer

To start with I embossed the background and sanded it. Then I embossed the onesie on scraps of red card and white card. After that I embossed the name and snowflakes and did some paper piecing. When the little onesie was on the card I added some stickles and a couple of gems to finish.

I'm submitting this card into the current Hero Arts Challenge (A Few of My Favourite Things category), as I used a couple of my favourite stamping techniques on this card - embossing and paper piecing.

Now I've got the song Santa Baby in my head, I'll be singing it all day long. Though I have to say I'm using the term "singing" very loosely here, as I'm certainly no Eartha Kitt!

Sunday, October 27, 2013

Wreath of Thanks

Between busy times at work and being sick, unfortunately I haven't had a chance to get inky in three weeks. So I was delighted this morning to finally get back into the swing of things and get up to my eyes in ink and paper!

I love Cath's gorgeous Tuesday Trigger photo over at the Moxie Fab World and am definitely one of those people who is enthralled with fall. I do love to see the first green shoots in spring, but for me nothing can beat the splendid display of colours that nature puts on for us in autumn.


My card was inspired by a number of elements from the photo - the gorgeous leaves, the wood in the background and the circular shape of the container.

IMGP1714
Stamps (Hero Arts) – Scattering Leaves & Celebrate Everyday

To start with I stamped the leaves using Hero Arts shadow inks (pale tomato, butter bar & orange soda), cut them out and then applied distress inks (barn door, spiced marmalade & mustard seed ) to the edges. I embossed the woodgrain background and embossed the sentiment in gold. To finish I just add a few gems.

IMGP1715

I'm also submitting this card into The Die Cut Divas Autumn and Animals Challenge.

It’s a bank holiday weekend here so we’ll get to enjoy an extra day off as well as the extra hour in bed we had this morning with the clock going back. Hope you have a great weekend too!

Sunday, October 6, 2013

Happy Happy Birthday

Given the day that was in it, I was delighted to have a chance to join in on Jennifer's fun scramble yesterday afternoon. The theme of the scramble was to make a birthday card for someone aged between one and eighteen years old.

One of my favourite stamps for birthday cards for boys is a cute rocket from the BAM! set by Hero Arts. So I inked it up yet again for this card.

IMGP1691

Stamps (Hero Arts) - BAM!, Tiny Star Background and Fantastic Birthday

To make the stars for the background, I embossed the Tiny Star Background in white, applied faded jeans distress ink and die cut into stars. I wanted a few more stars in the background so added tiny star gems, again from Hero Arts.

Initially I paper pieced a rocket, but it looked too dull so I just layered it with another rocket that I coloured with ProMarkers and a silver gel pen.

IMGP1697

The sentiment was also stamped with faded jeans distress ink. I'm submitting this card into the Color Media Challenge in the Moxie Fab World. Hope you had a wonderful World Card Making Day yesterday too!

Saturday, October 5, 2013

Trick or Treating Candy Corn

Happy World Card Making Day! I just love having a special day that celebrates making cards right around the world. I intend making the most of today by having lots of inky time throughout the day. In a little while I hope to join in on the fun with friends as we make cards in a scramble hosted by Jennifer over at the Hero Arts Group.

But a little earlier today I decided to play with some fun Halloween images that my good friend Linda sent me - thanks again, Linda:)

IMGP1678

Stamps (Lawn Fawn) - Trick or Treat and Sweet Christmas

Anyway I thought it might be fun to have these little candy corns from Lawn Fawn out trick or treating on a moonlit Halloween night. The sky and grass were made in the same way - I applied distress ink (either dusty concord or mowed lawn) to white card and sprayed with water. The little hill is on foam pads for some extra dimension. Then I die cut the moon with the sentiment and added an outline with diamond stickles.

After that I had to decide what the trick or treaters would wear for Halloween. I cut bat wings for the little one and the taller one ended up with some alien eyes. The wings came from the same set as the candy corns but I made the eyes from some images from the Sweet Christmas set. I also wanted to give the trick or treaters little legs so they could cover lots of ground on Halloween night (lol okay I know they’re not real!!) and used one of the lollipops from the same Christmas set to make them. The little candy corn trick or treaters were coloured with ProMarkers and colouring pencils.

IMGP1680

I'm submitting this card into the Color Media Challenge in the Moxie Fab World.

Hope you have lots of inky fun on World Card Making Day!


Saturday, September 28, 2013

Home Is Where the Heart Is

I've been having great fun trying out different things with Hero Arts' Brush Strokes set, but as soon as the Tiny Star Background (love this new stamp!) arrived the other day, I knew I wanted to combine it with one of the brush stroke images.

IMGP1659
Stamps (Hero Arts) - Tiny Star Background, Brush Strokes and Right at Home

I love this fun card by Kelly Rasmussen and fell for the tiny banner at the top of the card with the heart cut out. So I thought I'd make a banner with a cut out heart too but have it as the focal point on my card. I embossed the stars in white, applied faded jeans distress ink and cut out the heart and banner shape. On another panel of white card I stamped the brush strokes using barn door distress ink and placed this behind the banner using foam pads.

I used a lovely sentiment from the Right at Home set brought out by Hero Arts for Operation Write Home.

IMGP1672

By changing the sentiment I could also use the card for a 4th July card or for our older son's birthday as he was born on 4th July. I'm submitting this card into the Color Media Challenge in the Moxie Fab World and the current Hero Arts Challenge.

Hope you have a great weekend:)

Thursday, September 26, 2013

Gossamer Wings in Handmade Cards

I like when I can combine a bit of stamping and a bit of stitching on my cards. In the case of this card today, there’s a little stamping and a lot of stitching.

Gossamer Wings

Stamp (Hero Arts) – It’s Your Day
Die (Hero Arts) – Butterfly

The card was recently published in the fabric and fibres section of Paper Crafts Handmade Cards. When I came home from work this evening, I started poring over the digital version of the magazine. It looks like it's packed full of wonderful projects and I'm not even halfway through the magazine yet.


For the background I used lots of distress inks (barn door, spiced marmalade, mustard seed, shabby shutters, tumbled glass and dusty concord) and went with matching threads on each panel. After die cutting the butterfly, I added a piece of silver organza to the back to give parts of the wings a semi transparent look. To finish it off I added a bit of bling. Thanks for visiting:)
Related Posts with Thumbnails